How to Install Foxit PDF Editor
This article will guide you, step by step, through how to install Foxit PDF Editor, set the application as your default program for PDFs, and the process for using it for the first time. Everything you are meant to click on will be circled in red.
Installing From Software Center
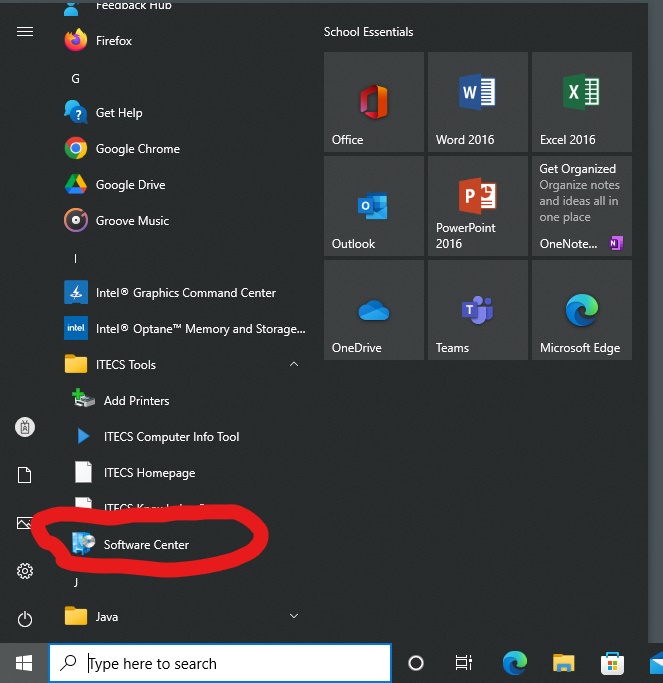
- Open Software Center: Software Center can be found in the Start menu inside of the ITECS Tools Folder.
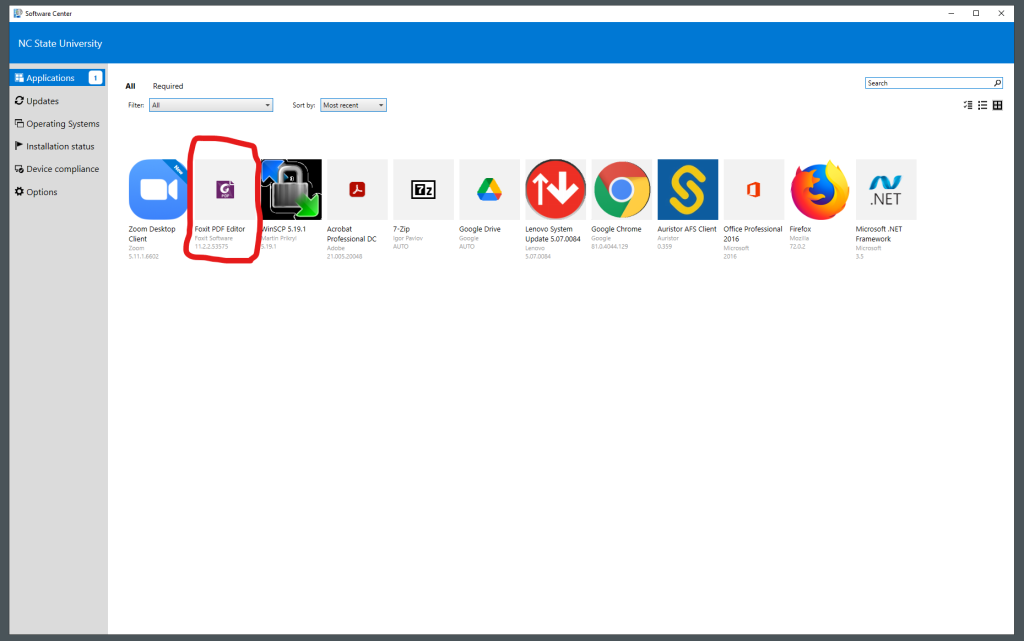
- In the Applications tab of Software Center (the default tab upon opening), click on the Foxit PDF Editor icon.
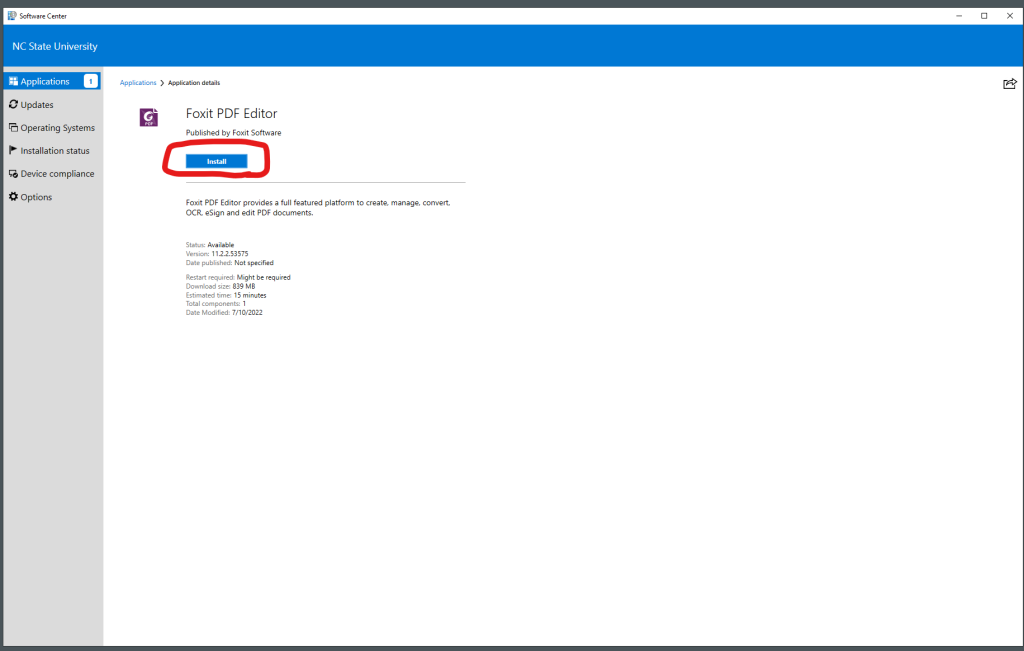
- In the page for Foxit PDF Editor, click on the install button and wait for Software Center to download and then install the application.
Setting Foxit PDF Editor as the Default PDF Application
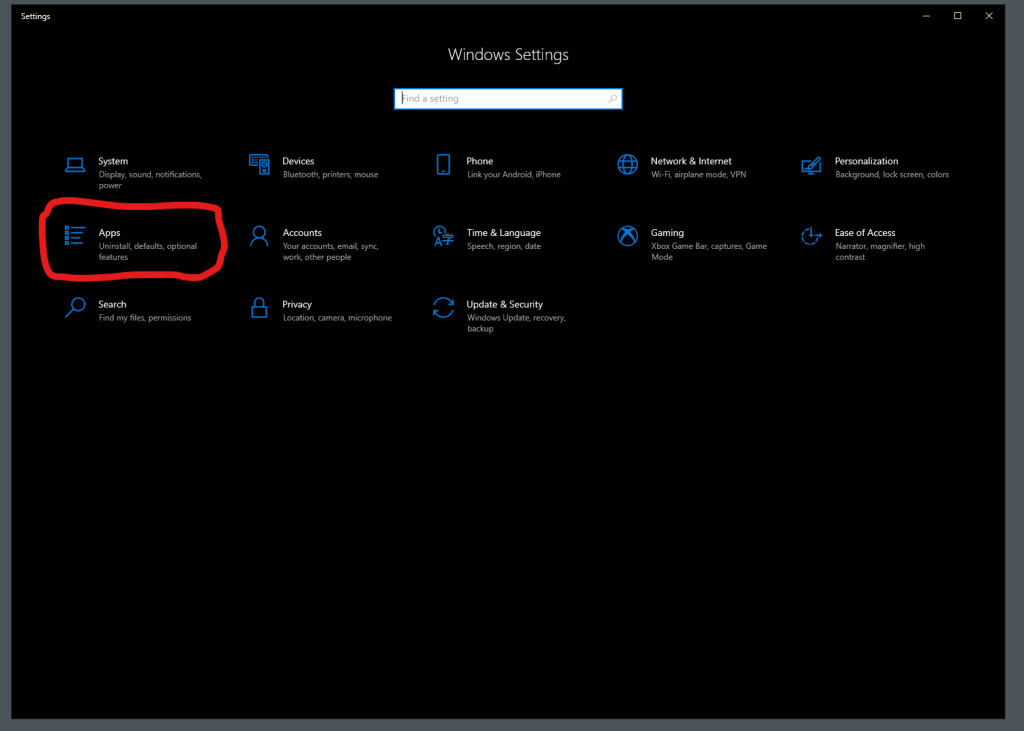
- Open Windows Settings. In the Start menu, Settings is accessed by clicking on the gear icon located on the far left side of the menu.

- Once Settings has opened, click on the Apps section.
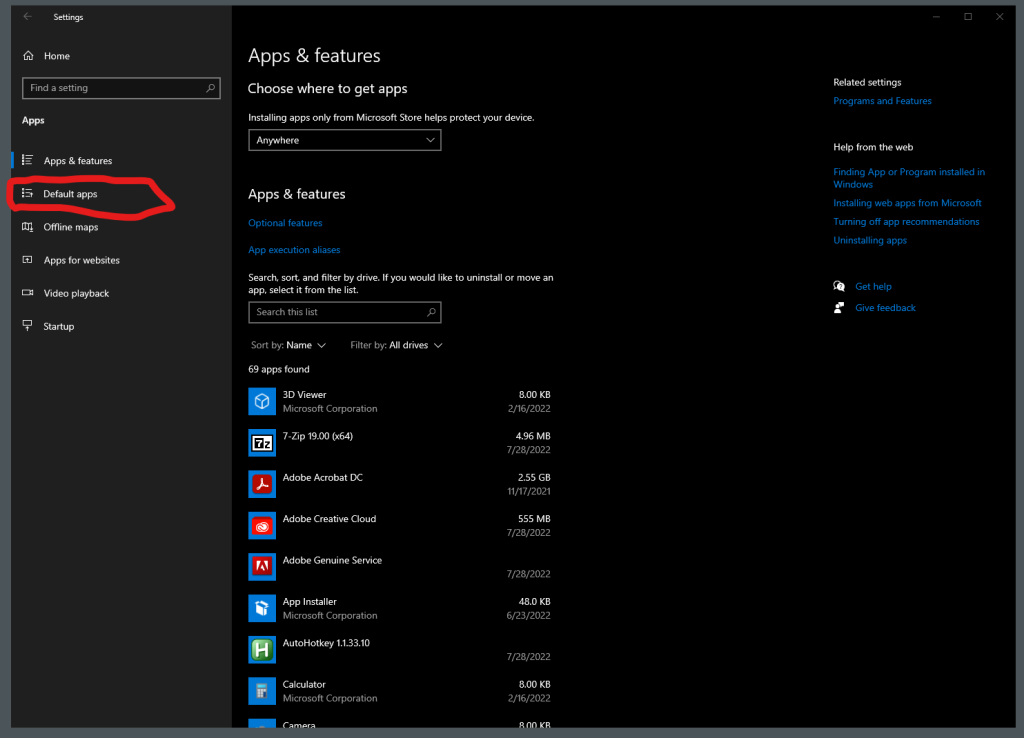
- Now click on the Default Apps tab on the left hand side of the window.
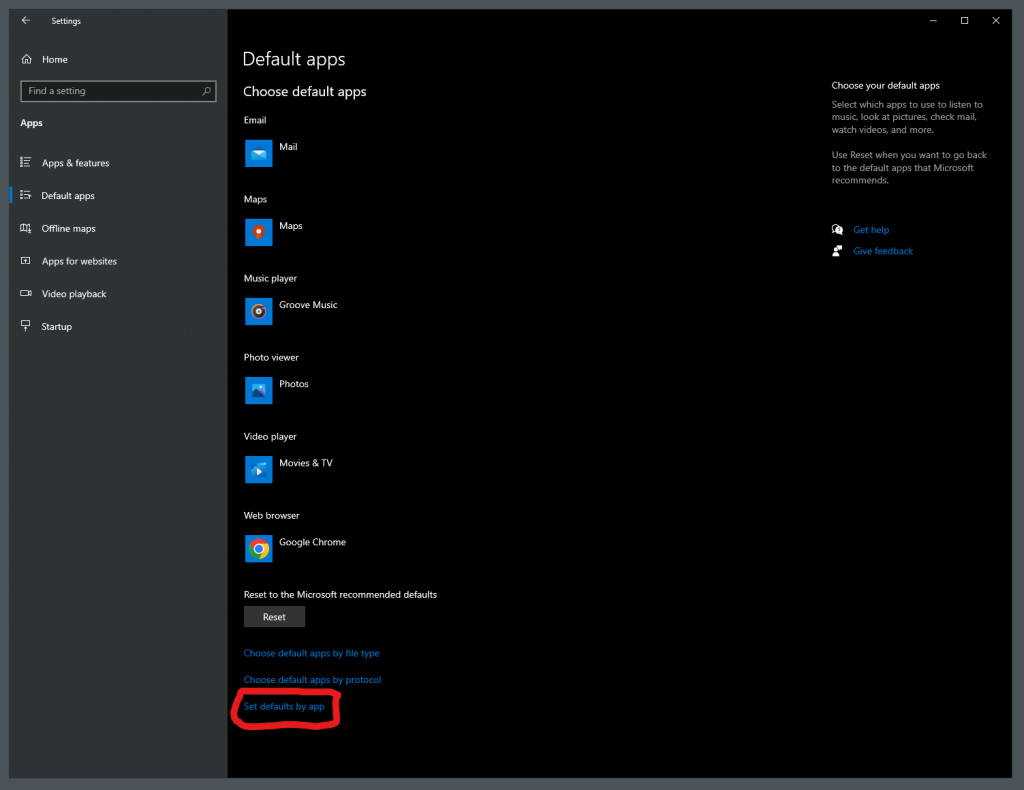
- At the bottom of the Default Apps section, there is a blue line of text that reads “Set defaults by app.” Click on this line of text.
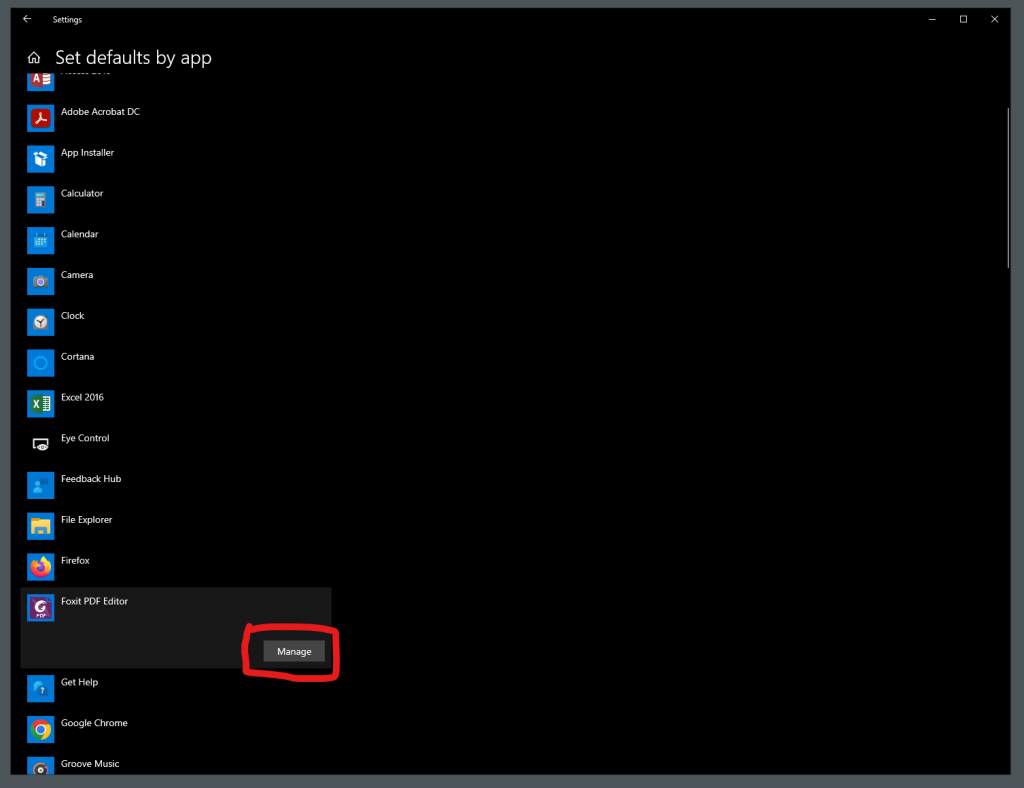
- There should now be an alphabetical list of all the programs installed on the computer. Find the entry for Foxit PDF Editor and click on it.

- Now click on the mange button.
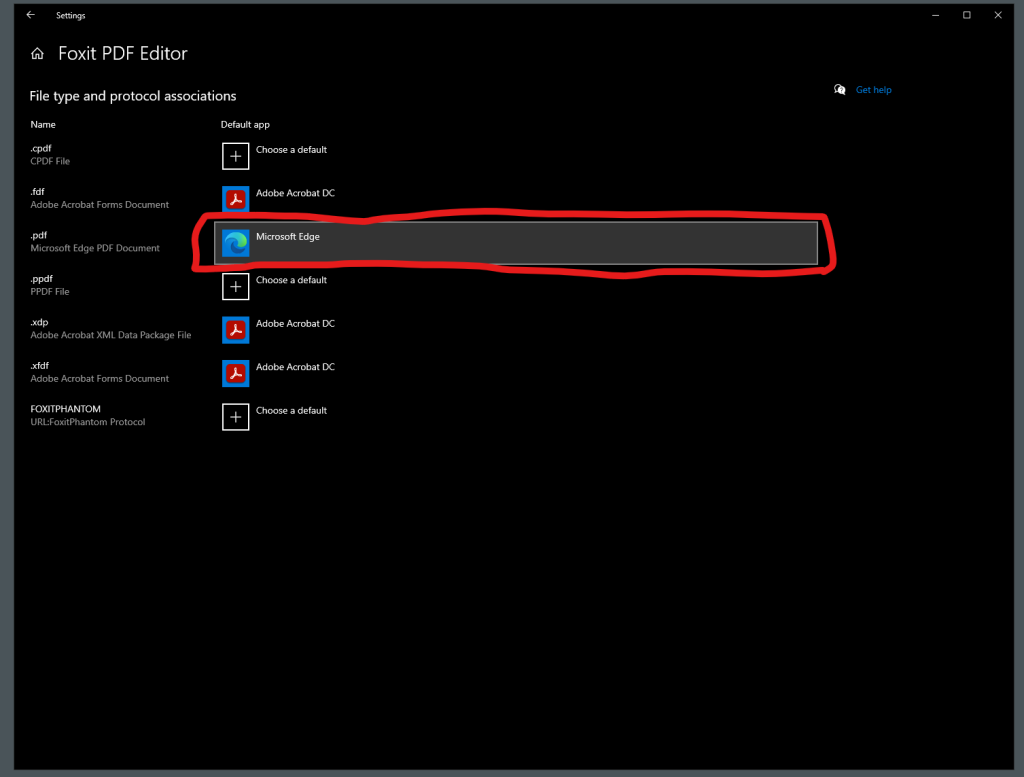
- A list of the different file types Foxit PDF Editor can interact with should now be displayed. Go to the entry for .pdf and click on the icon for the current default app (might be Adobe Acrobat, or possibly a web browser).
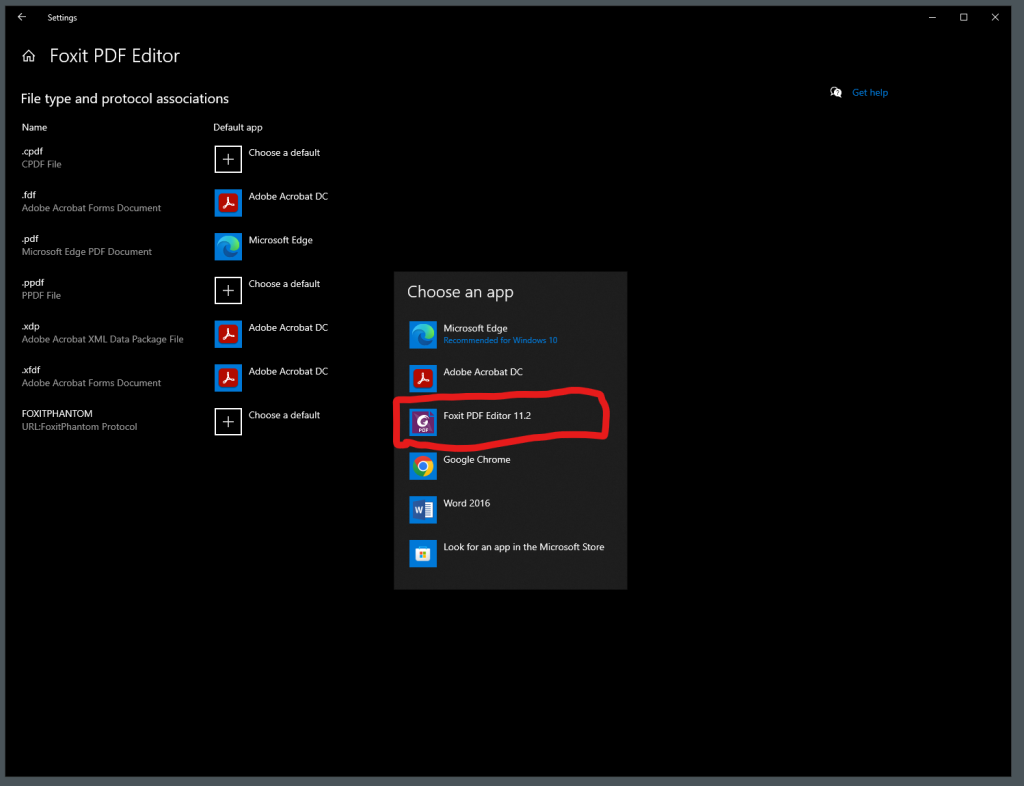
- A small pop up window will now appear with a list of possible applications to now select as the default program for opening PDF files. Find and click on Foxit PDF Editor.
- Foxit PDF Editor is now the default application for opening PDF files.
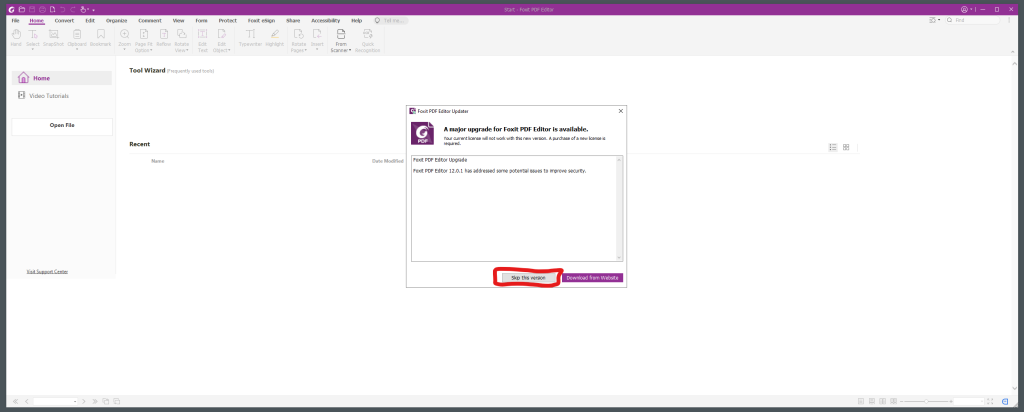
Launching Foxit PDF Editor for the First Time
The first time you open Foxit PDF, you may get a notification from the program that there is a newer version available. Click on the “Skip this version” button.