NCSU Block Editor Tutorial
You may have heard of the block editor before when it was called “Gutenberg.” Since it was introduced in core WordPress 5.0, I’ll be referring to it as the block editor. Through building a sample landing page, this tutorial will familiarize you with the block editor and the NCSU Blocks plugin. Creating and customizing your own brand-compliant layouts using block editor is just a working example away — let’s begin!
What is the block editor? How is it different from the classic editor?
The block editor has completely changed the content creation experience. Rather than placing all of your content into a single edit field, you’re putting together blocks to build your layouts. Also, the toolbar with additional formatting is no longer available to the entire page. Each block comes with its own set of customizations. Let’s talk about blocks themselves. What is a block?
Think of a block as a “chunk” of content — just about every item you can think of is a block:
- Paragraphs
- Images
- Columns
- Embedded videos
[ Insert drawn visual of page broken up into content “chunks” ]
What’s so great about this approach is that you can customize individual blocks and avoid impacting other areas as much (or at all). You can also add more complex features without having to immediately resort to installing a plugin.
What do I need to get started with the block editor?
We strongly recommend that you have these plugins installed on your site first:
- NC State Blocks
- NC State Accessibility Helper
Let’s Build a Sample Page
We’ll practice using the block editor by recreating this sample landing page. Please find your department’s “hillsborough-preview” link and add a new page called “Block Editor Training.”
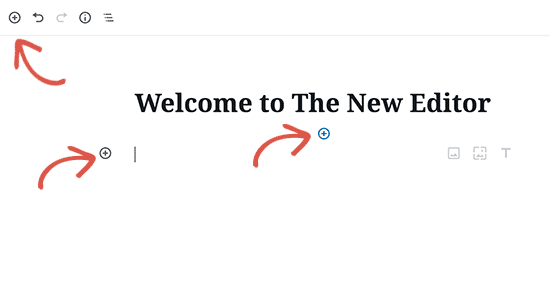
You can add blocks to a page by clicking on the round buttons with a plus sign inside them. The blue one is only accessible when you hover over a block. Hovering over blocks can be a little finicky — additional options may quickly appear and disappear. It takes some getting used to. Blocks can easily be added and removed, so feel free to explore navigating the editor.

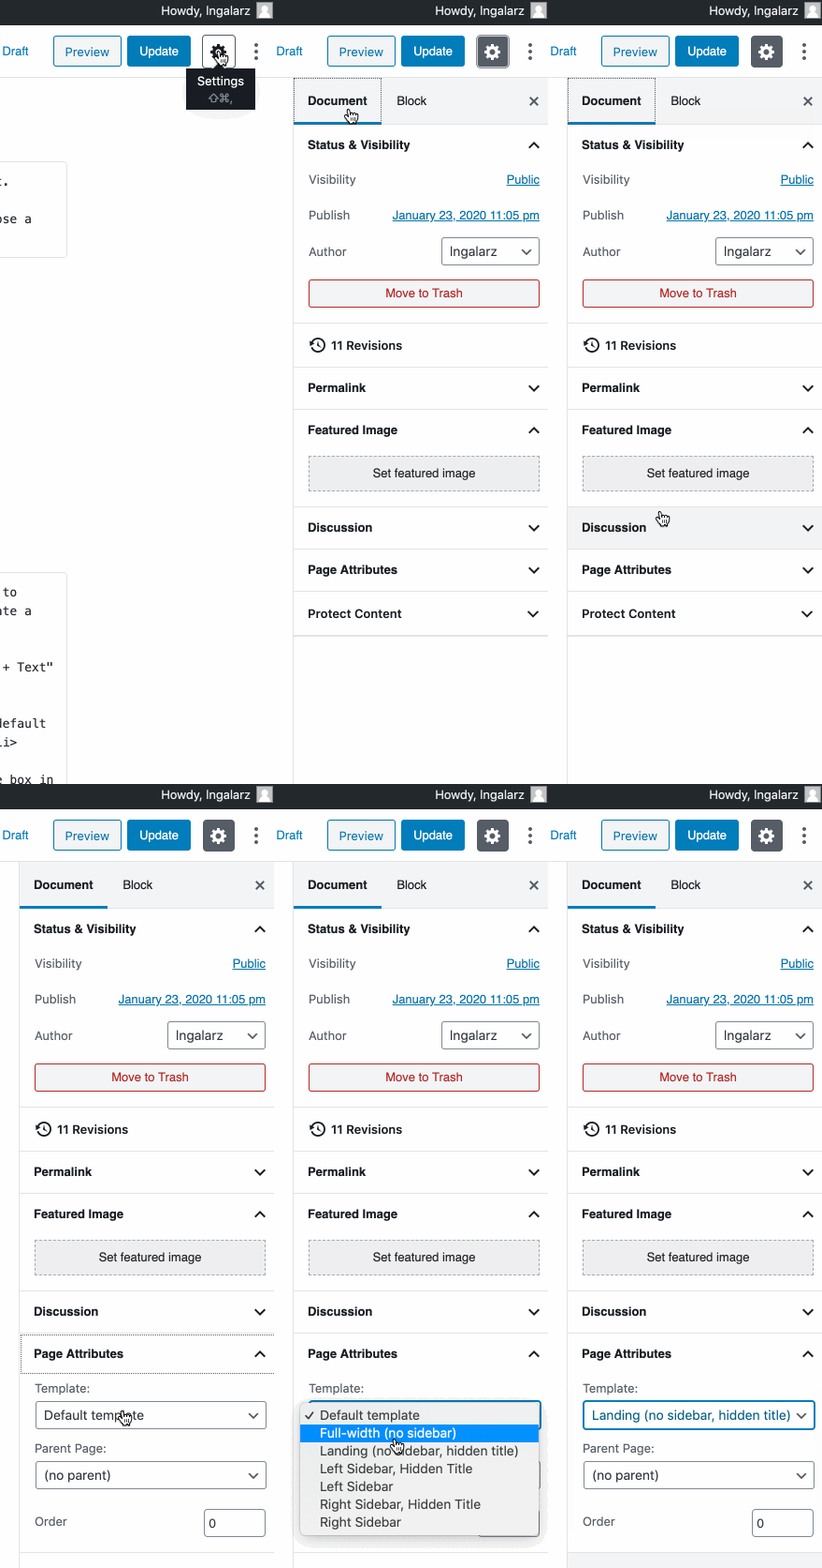
- Once you have created a shiny new page, take a look at the right-hand sidebar. You have two sections, click on “Document” first. Scroll down to “Page Attributes” and change the “Template” to “Landing, (no sidebar, hidden title).”
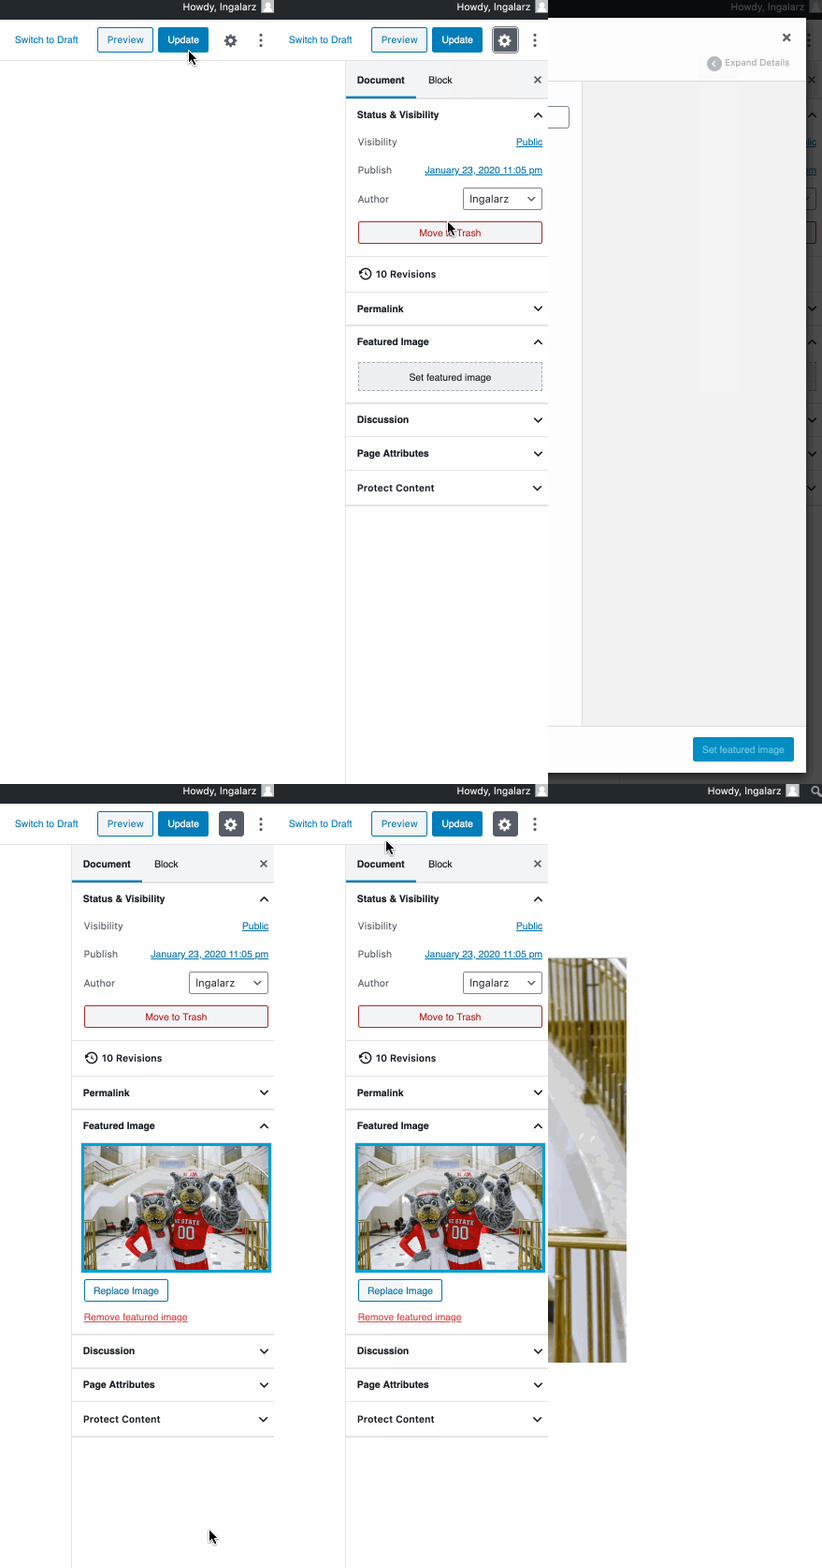
- Within the “Document” settings, go up to “Featured Image” and select one from your media library, or upload one. Make sure you choose a high-resolution image! You need plenty of pixels to have a crisp featured image.


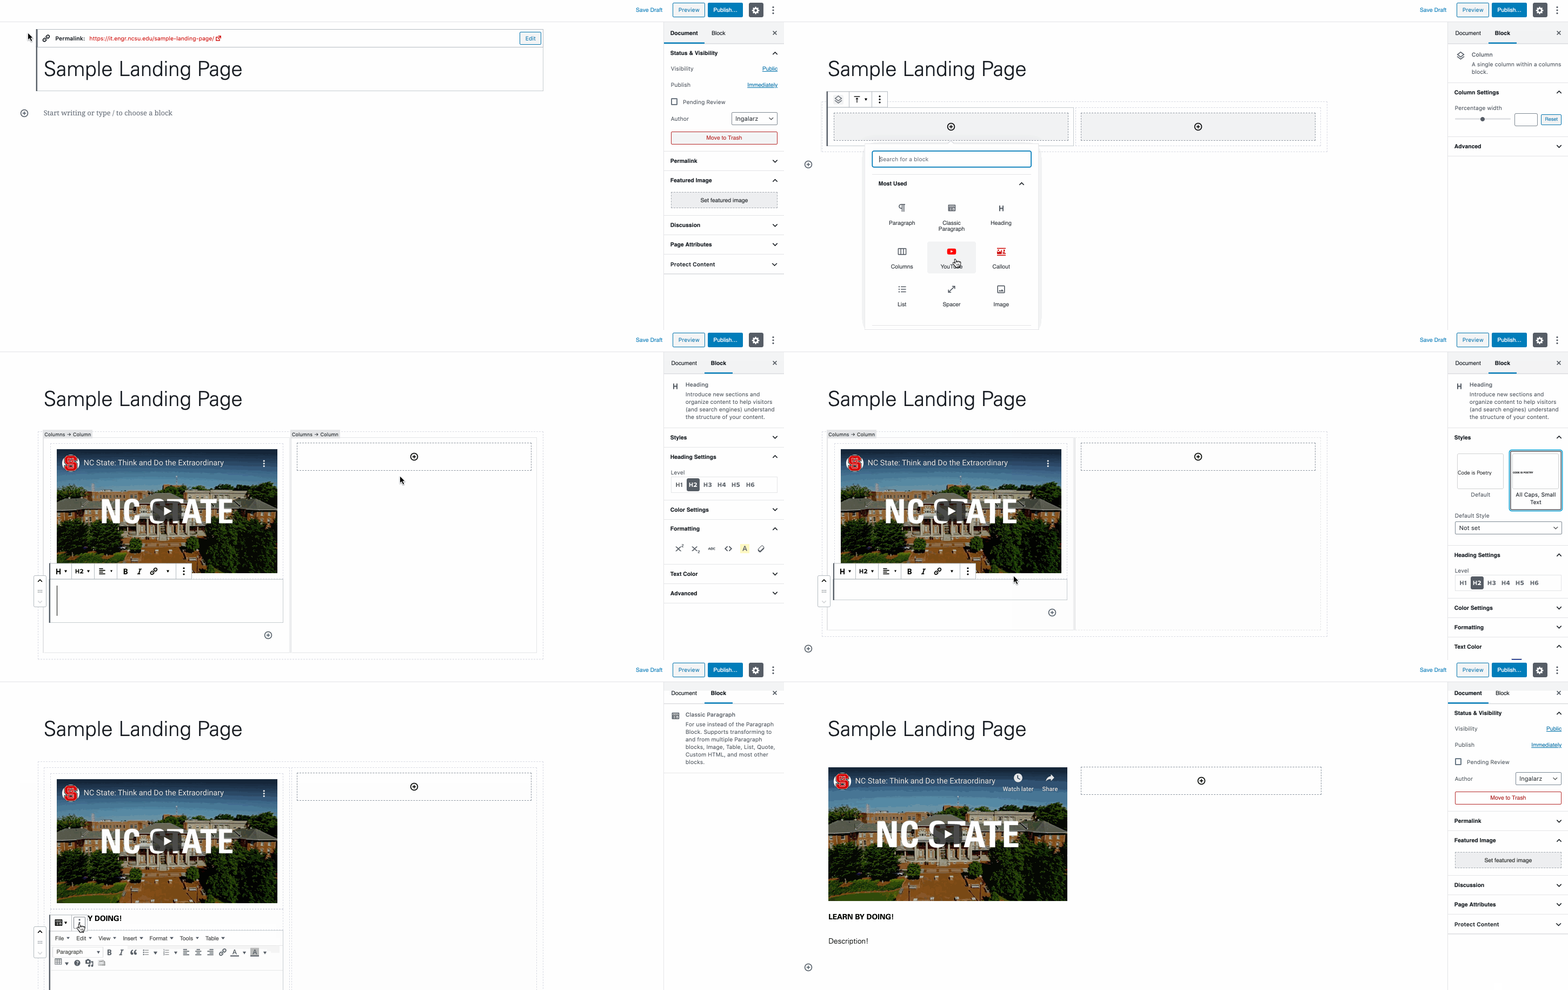
- Use a “Columns” block to break your layout into two sections. Hover inside the left column and add a “YouTube” block to embed a video. Add a “Heading” block just underneath video with the line “Learn by Doing”. Experiment with the available settings to create a custom look. Put in a “Paragraph” block under the heading with some generic text. Turn one of the lines of the paragraph into a link.
- In the right-hand column, add a “Heading” block. Or try a “Icon + Text” block. I inserted a “List” block just underneath the “Icon + Text” block to break up the look of that column.
- Let’s add some splash with a “Callout” block! Use the block settings in the right-hand sidebar to construct your callout with the default layout, using “Align Center”, add a link in the “Behavior” section, “Align Image Right”, and select “Carmichael Aqua” under “Color.”
- Personally, I like using the “Spacer” block to add a little extra space in between major sections. Usually I adjust the size of the box in “Spacer Settings” to 10 pixels. After adding a spacer, pop in a “Icon +Link” block for “News + Announcements”.
- This section is a good example of how blocks have replaced some plugins that provided advanced functionality. Add a “Recent Posts” block to the page and use the right-hand Blocks sidebar to customize it. My example removes post images and author names.

References:
1. https://www.codeinwp.com/blog/wordpress-gutenberg-guide/
2. https://www.wpbeginner.com/beginners-guide/how-to-use-the-new-wordpress-block-editor/

